1. Create a Flow in Power Automate or Use the workflow template in Microsoft Teams
1.a Power Automate:
- Navigate to your SharePoint library where you want to implement this workflow.
- Select the file you want to send for approval.
- Click on the “Show actions” button (usually represented by three dots).
- Hover over “Automate” and select “Request sign-off.”
- 1.b Teams Workflow:
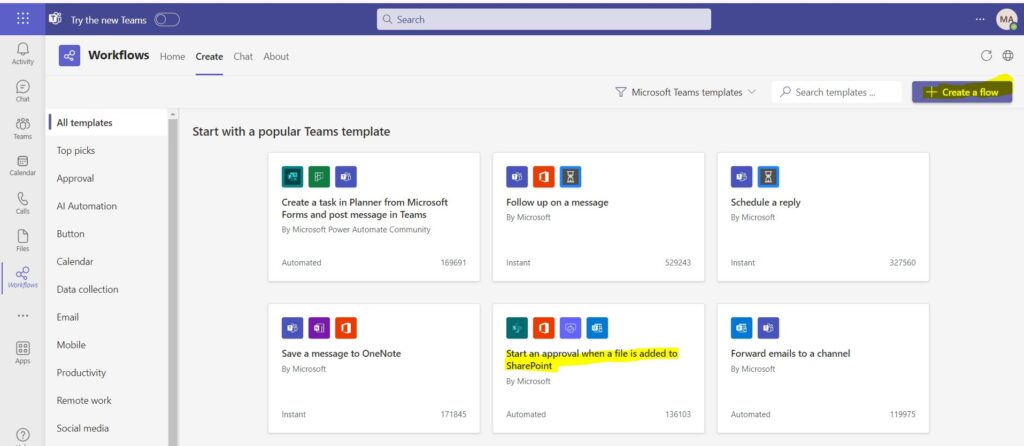
- Navigate to the Teams channel.
- Select “Create a Flow” then select ‘Start an approval when a file is added to SharePoint”the file you want to send for approval.”
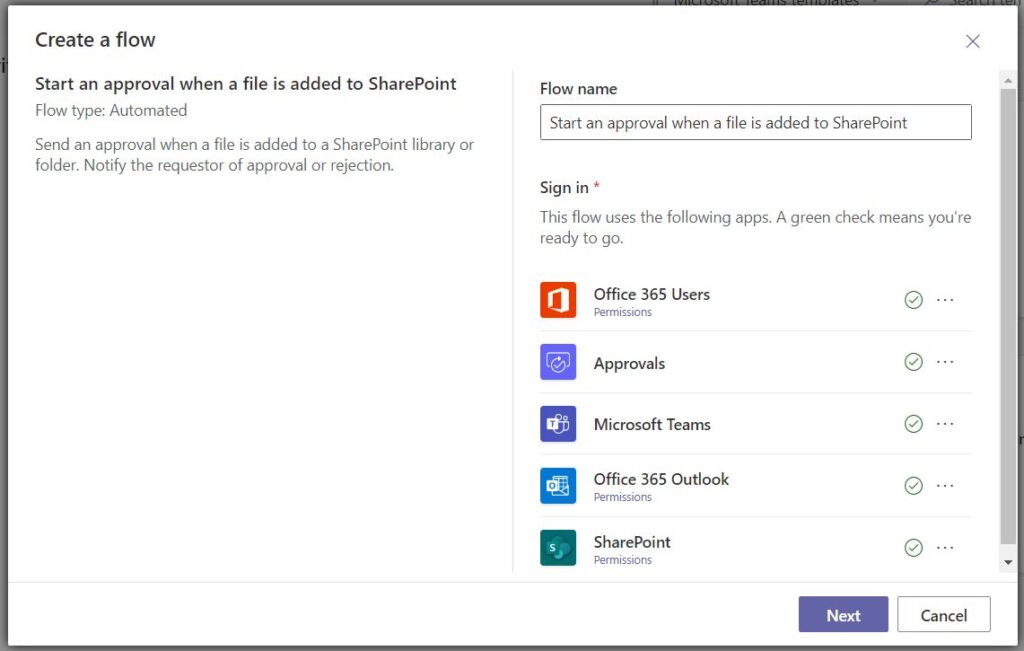
- Give a name to the flow and make sure all authentication is done to all the required resources and then select Next
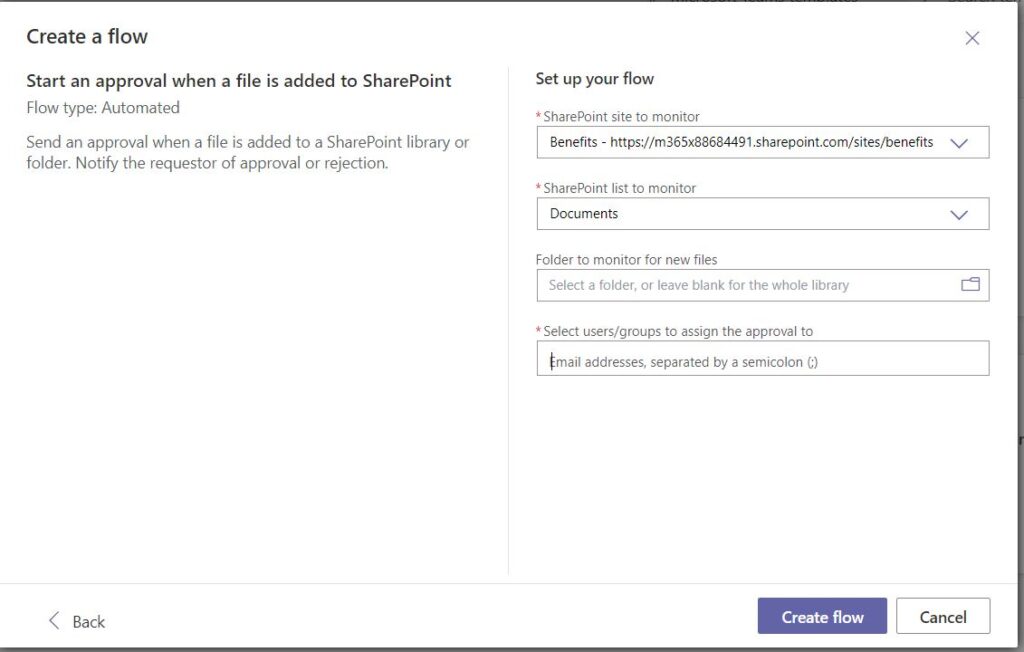
- Set up your flow with URL, list/library to monitor and users who should get email for approval.
Note : You can select multiple approvers for the library. - Select Create flow
2. Configure the Approval Flow
- In the approval configuration screen, you’ll need to:
- Specify the approvers (individuals or groups who will review the file).
- Enter a message or instructions related to the approval request.
- Click “Run flow” to initiate the approval process.
3. Approval Process
- Once the file is added to the SharePoint library, the workflow will trigger.
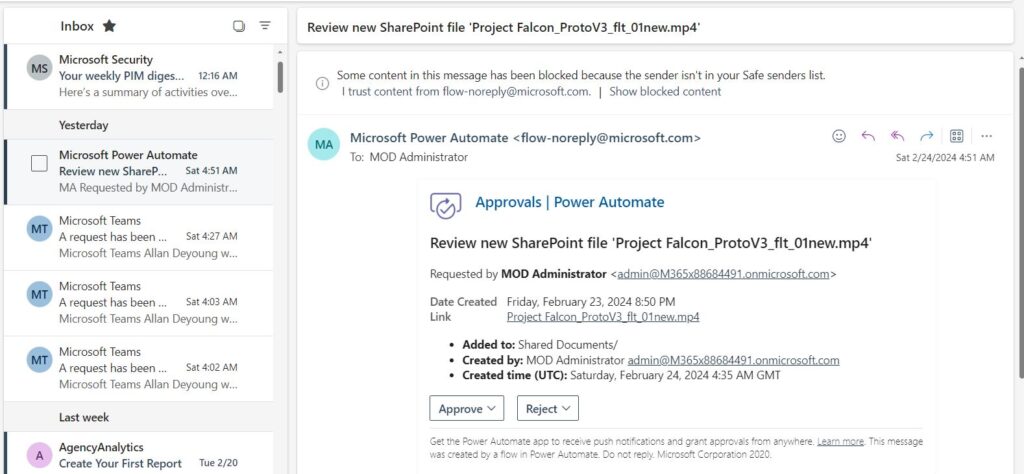
- The specified approvers will receive an approval request notification.
- Approvers can review the file and either approve or reject it.
- The requestor (the person who added the file) will be notified of the approval or rejection decision.
4. Additional Considerations
- You can customize the approval email template to include relevant details about the file.
- If the file is rejected, you can set up additional actions (such as notifying the requestor or updating the file status).
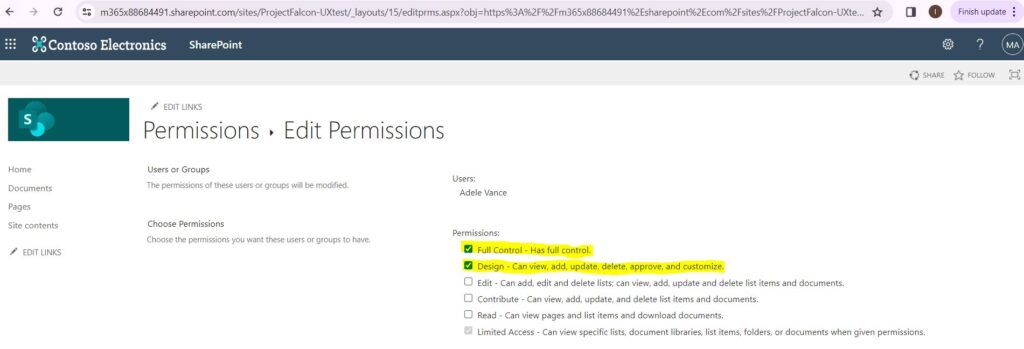
- The Approver set in the flow should have Approver/Design or Owner permission on the list/document library.
Regards,
Inderjeet Singh Jaggi
Cloud Architect – Golden Five Consulting
Info@GoldenFive.net
